


I have a girlfriend that does not sew much. She really wants to sew more. She recently made the comment to me, "Irene, I wish I could just sit and watch you sew for a day. That way, you could show me the little things in sewing." I love this friend very much...but I have to admit, if this particular friend sat and watched me sew...NOTHING would get sewn. We would laugh, laugh, laugh and then laugh again. This friend wants to learn how to make a fun phone cozy. So, I decided to show you and my friend how to make a super cute and super easy phone cozy.

First, start with two strips of fabric, both cut to 4.5 inches by 12 inches.

Because your phone cozy will be protecting your phone, I use both a fleece interfacing, and a light weight interfacing. Apply the fleece interfacing to the wrong side of outside fabric. Then, apply the light weight interfacing to the wrong side of the lining fabric.

Next, attached an elastic band to the center of one of the short ends of the outside fabric. Then sew on a button, approximately 2 inches down from the center of the opposite short side.

Place your two strips of fabrics right sides together and sew a half inch seam all the way around the cozy, making sure to leave a 3 to 4 inch opening for turning.

Before turning, make sure you clip your corners. Then, turn the fabric to the right side out through the opening. Once you turn the fabric out, iron the fabric. Then top stitch the two short ends of the cozy.

Now, fold the cozy in half, lining sides touching each other and pin your sides. Top stitch starting at the top of one side, working all the way around to the other top side.

There you have it. Done.
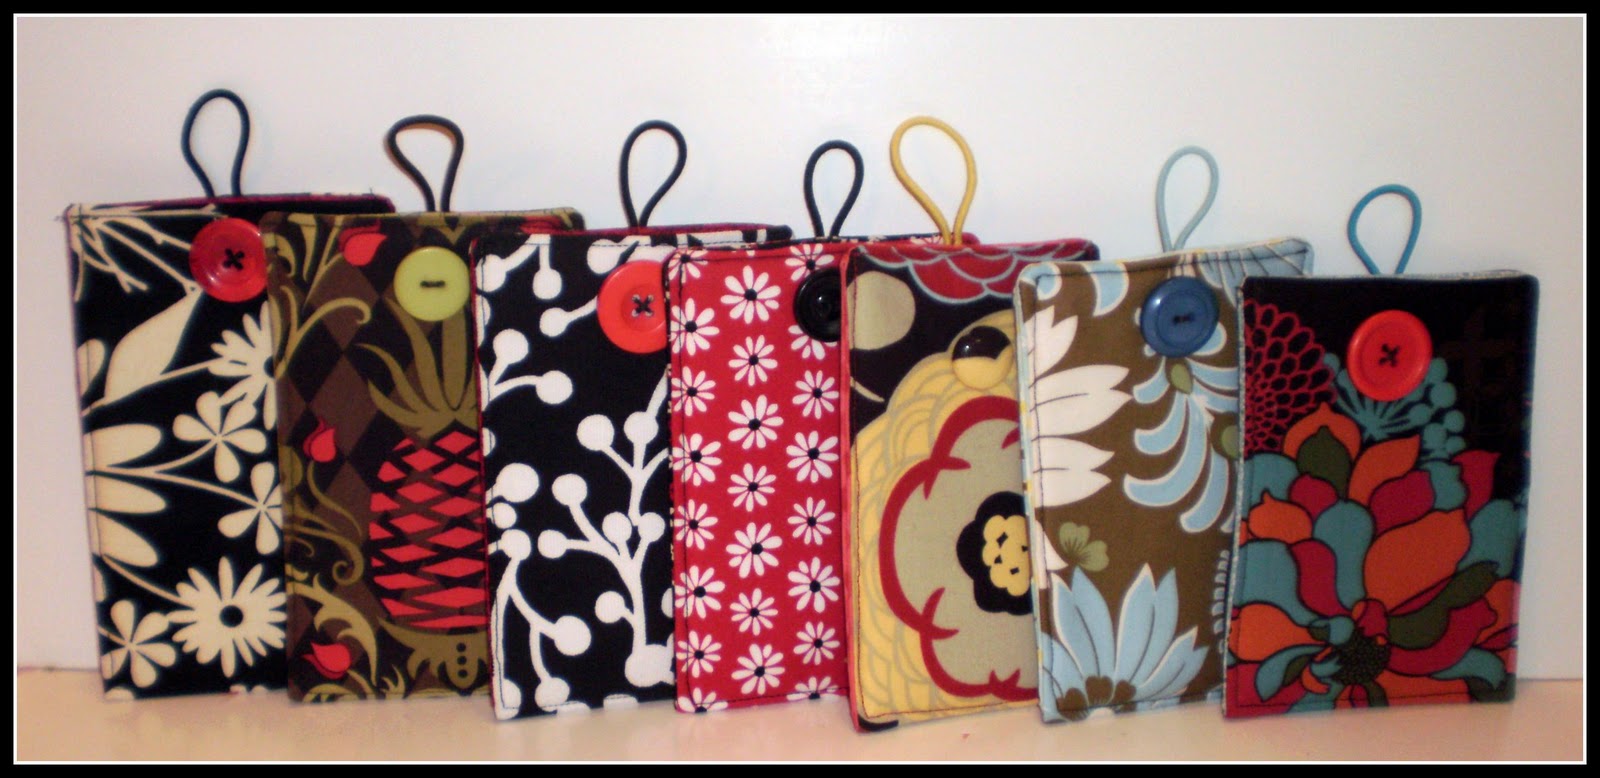
I made these cozyies up tonight. To make all 7, it took me 2 hours and 15 minutes. So, approximately 20 minutes a cozy. Not bad for when you need a quick gift!
I am linking this at these parties:


Wow, what a great craft! They are cute and functional! I'd love for you to submit this to the M&T Spotlight - http://www.makeandtakes.com/spotlight
ReplyDeleteAdorable!
ReplyDeleteAwww, all of these are so adorable! What a great idea :)
ReplyDeletePS: Today is the last day to enter my first ever giveaway on my blog, and I'd love if you'd stop by and enter! Check it out: http://mygirlishwhims.blogspot.com/2011/02/my-first-giveaway-and-introducing-your.html
They look great, thanks for the tutorial. The fabrics are wonderful!
ReplyDeleteCute! I hopped over from Trendy Treehouse and now a new follower. Would love for you to stop by sometime.
ReplyDeletewww.acreativeprincess.blogspot.com
These look very nice! I'm haven't sewn much, but your directions are great so I'm sure I'll do just fine. Thanks!
ReplyDeletecraftingcookingandcats.blogspot.com
Very cute! I love the fabrics you have used.
ReplyDeletehttp://itsybitsypaper.blogspot.com
What a great idea! Great fabric choices too!
ReplyDeletethis is so precious
ReplyDeleteI must make one....ASAP
xoxo
bB
Hey,
ReplyDeleteI was making this last night, and I am a VERY NEW sewer, and I was having trouble with the top-stitching. I got all the past sewn together, but I am having trouble with the last step where you top-stitch around the entire cozy to close it up. My machine seemed unable to sew through that many layers of fabric. Is there a special setting I should be using? Your help is appreciated! Thanks.
Hi Dianna~ I would email you, but when I click on your name, it doesn't give me your email, so I hope you come back and check here! I am sorry you are having trouble. When it comes to the top stitching, you are dealing with a lot of fabric. My advice, make sure your hold your threads behind the presser foot, and kind of pull the threads to help the feed dogs (the grips under the fabric) grab the fabric. I have also found that if I start sewing and I turn the wheel on the machine at the same time that will help too. There is no doubt, it is thick, but I made these cozy's on an average sewing machine, nothing fancy and it worked. Try these few tricks and let me know if that worked for you.
ReplyDeleteThanks!
Irene
Thanks for the suggestions! I will try these. I appreciate your help!
ReplyDeleteMy actual blog address is blog.dianameredithdesigns.com. I used to have a blogspot account, but I switched over a few months ago.