Custom Blog Design
Showing posts with label Tutorials. Show all posts

Thursday, May 5, 2011

New Mail Organizer

Stay with me for a minute....you know that song by Eddie Money, Think I'm in Love? Sing it with me...

I think I'm in love
And my life's lookin' up
I think I'm in love
'Cause I can't get enough
I think I'm in love
It's gotta be love

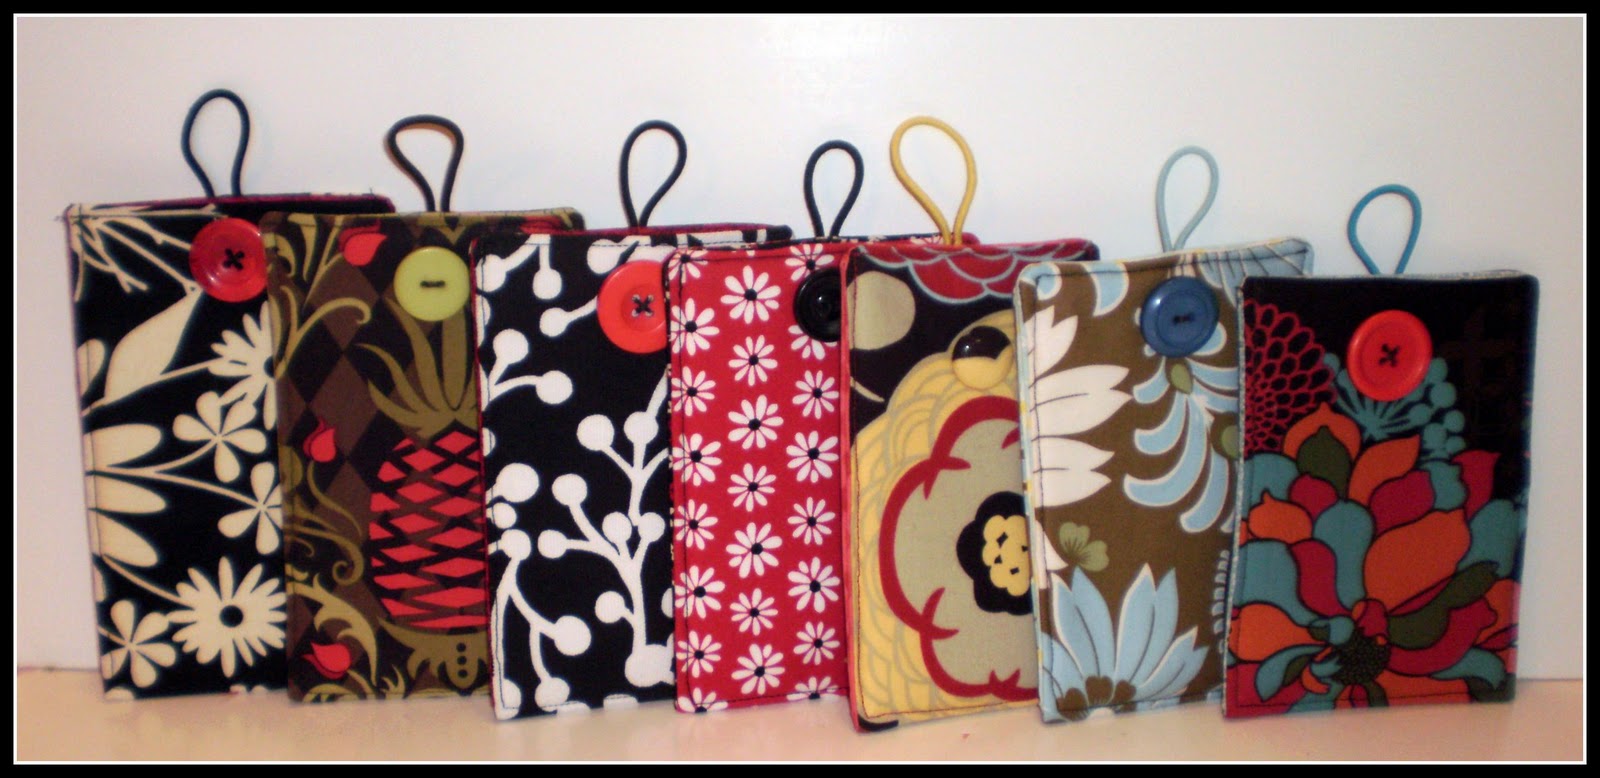
All you 40 somethings, you know the song! Well, I can't stop singing this song because of this....
Are you in love now too! Dang this mail organizer is stinking cute! 
I LOVE, LOVE, LOVE the HEATHER BAILEY fabric more than I can tell you. 
We get sooooo much mail, and it ends up all over the house. So when I saw the tutorial for this mail organizer at Noodle-Head I knew immediately that I wanted to make this. 
This is the top pocket. 
And this is the bottom pocket. I did mine just a bit different in that I used a wider ribbon, and added the bow. I also used one large frame for the title.

Here is the original one that I fell in love with at Noodle Head.
How could I not fall in love with this? Anna also used Heather Bailey fabric as well for her mail organizer. And, the tutorial is spot on! Super easy to read and understand. Hats off to Anna!

Oh ya, one last thing....

Today was my Assistant's (aka Dad's) birthday. I just want to say
HAPPY BIRTHDAY DAD!
 I am super lucky to have such a great father.

I hope you had a great birthday...now, get back to work! :) 


Linking here:

Thursday, March 3, 2011

Easy Phone Cozy!

I have a girlfriend that does not sew much. She really wants to sew more. She recently made the comment to me, "Irene, I wish I could just sit and watch you sew for a day. That way, you could show me the little things in sewing." I love this friend very much...but I have to admit, if this particular friend sat and watched me sew...NOTHING would get sewn. We would laugh, laugh, laugh and then laugh again. This friend wants to learn how to make a fun phone cozy. So, I decided to show you and my friend how to make a super cute and super easy phone cozy.

First, start with two strips of fabric, both cut to 4.5 inches by 12 inches. 
Because your phone cozy will be protecting your phone, I use both a fleece interfacing, and a light weight interfacing. Apply the fleece interfacing to the wrong side of outside fabric. Then, apply the light weight interfacing to the wrong side of the lining fabric. 
Next, attached an elastic band to the center of one of the short ends of the outside fabric. Then sew on a button, approximately 2 inches down from the center of the opposite short side. 
Place your two strips of fabrics right sides together and sew a half inch seam all the way around the cozy, making sure to leave a 3 to 4 inch opening for turning. 
Before turning, make sure you clip your corners. Then, turn the fabric to the right side out through the opening. Once you turn the fabric out, iron the fabric. Then top stitch the two short ends of the cozy.
Now, fold the cozy in half, lining sides touching each other and pin your sides. Top stitch starting at the top of one side, working all the way around to the other top side. 
There you have it. Done.  
I made these cozyies up tonight. To make all 7, it took me 2 hours and 15 minutes. So, approximately 20 minutes a cozy. Not bad for when you need a quick gift!

I am linking this at these parties:

Saturday, February 5, 2011

Flower Addict!

I absolutely love any type of fabric, knitted, crochet or felted flowers. I needed to make some fabric flowers up for a gal, so I thought I would show you real quick how I did it.
This is the style fabric flower I am going to show. 
Out of card stock, cut out your pattern. You will need three circles. I did mine at 3.5, 3 and 2 inches. 
Using the pattern, cut 4 of each size out of different fabrics. Also, cut a 2 inch and 3 inch circle out of felt. 
The first thing you do to assemble the flower is to put hot glue from the center of the circle, to the 12 o'clock position. 
Fold the circle in half lengthwise. 
Next, put a bead of hot glue from the center to the 3 o'clock position. 
Fold the circle so that the right edge of the half circle now is the middle line. 
Once folded, this is what it looks like from the side. 
Do this technique to all the circles. 
Now, take the 2 inch felt circle and hot glue on the petals, each petal taking up a forth of the circle. 
The second petal will overlap the first a bit. 
Continue gluing the petals all the way around the circle. 
Now do the same thing with layer numbr2. 
'
Now, start on the third layer. 

Then add a decrative button the the center of your flower. 
Now, take your large felt circle and hand stitch a pin backing to the felt. 
Now, hot glue the medium circle felt backing to the pin.
And there ya go! A super fun and simple flower! I love it! 


Wednesday, February 2, 2011

Dust Cover for my Expression

I live in a desert. I just have three words for that...dust, dust and dust! I can dust and two hours later, it's back! I like for my sewing machine to be covered when I am not using it, so why not my Expression? So, tonight I put a little tutorial together to show you how I did it.

The first thing you have to do is pick your fabric. I love Heather Bailey fabric and already have a lot of her fabric in my sewing room...
My sewing machine dust cover 
The throw pillow on the chair in my sewing room 
Mrs. M only wears Heather Bailey 
My favorite bag I made out of Heather Bailey 
The little chandelier above my sewing machine even has shades that are covered in Heather Bailey fabric. So the choice for the Expression dust cover was simple...Heather Bailey of course! 
I started the cover by cutting the main fabric 21 3/4 inches wide by 20 inches long. You will want to use iron on fleece on the main fabric. 
I made a pattern for the two end pieces by holding up a piece of paper at the end of the Expression and traced it. I added a half inch for a bit more room and for the seam allowance.  
Then cut your two end pieces out. 
I decided to put a pocket on the back of the dust cover to hold the cords. So, cut another piece of fabric 21 3/4 inches by 13 inches.
Then you will want to iron on fleece interfacing. To both give stability and because I did not line the cover with another fabric, the fleece interfacing is really soft. 
Fold pocket fabric over, right sides together. 
Sew around the three edges 1/8 of an inch, keeping an opening on one of the edges to turn the fabric.  
 I decided to sew on red rick rack to jazz it up a bit. 
Place the pocket on the right side of the body fabric two inches above the bottom. Then top stitch the bottom of the pocket onto the outer fabric. 
Take the end pieces and pin them to to the body fabric, easing the fabric around the turns. 
It will be a bit tricky, but this is what it should look like! Once pinned, sew a 1/4 inch seam. Repeat on the other end of the dust cover.
Try on the dust cover! 
I need to hem the length, the same way you would a dress or skirt.

Iron a 1/4 inch rolled hem and then stitch the hem in place. 
A new dust cover for the Cricut...I love it! 
The backside is super cute with the rick rack! 
Well, whatcha think? This was super fast, and super easy. But there is something wrong here...Little Cricut, your turn is next for a new dress!

Related Posts Plugin for WordPress, Blogger...