Custom Blog Design
Showing posts with label Remodeling. Show all posts

Monday, July 16, 2012

A little bit of black paint!

That's right...a little black paint never hurt anything! In fact, I think that it is safe to say, a little black paint helps everything! Example...
Here is the hutch that is in my dining area of my kitchen. I love it. It has a whitewash on the simple pine wood.

It has served me well...but the dishes kinda get lost in the hutch, so I needed to change that.

So, on a whim, I painted it black! Now all you experts out there cover your ears for a moment...

I didn't dust, clean, strip, sand or anything before I slapped the paint on!!!! And, it still worked!

My girlfriend asked if I was going to leave the inside natural while I was painting the hutch...hadn't thought about it until that moment, and so I went with her idea, and I love it.

Even though the back of the hutch is still natural, I think that the plates and such still look great!

So, now on to painting the table and chairs...I will keep you posted! And, don't be afraid to paint something with a little bit of black paint!

Oh, and by the way, the little cream sample on the wall to the left of the hutch is the color of the wainscoting that I hope to put up soon! :)

Thursday, February 10, 2011

Bar Stools Makeover

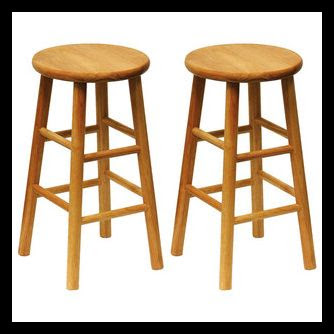
I am sure at one time or another everyone has had these bar stools in their kitchens...You all know the ones I am talking about, the cheapest bar stools at Target, Walmart or Kmart.
 Well, I have three of these beauties and I have had them for over 10 years. I also have three boys, 8, 9 and 10 who have eaten probably 90% of their breakfasts and lunches at these three bar stools. My three boys are not neat when eating. These bar stools have dried on milk, Cheerios and other things that I don't want to even begin to think what it is! It has gotten to the point where I can't even look at them anymore.

So, I did it. I packed up these three bar stools, put them in the trunk and headed straight over to my dad's house. I didn't even tell my dad I was there. I put the bar stools in my dad's garage and waited for him to notice. About three hours later, my dad calls me to inquire why my bar stools are at his house. I just said, "Dad, please paint these bar stools black." After many hours of sanding these beauties, finally, he was able to paint them. Well, tonight, my dad returned the bar stools. 
10 times better! I love them black! I am certain that the black will cover up all the spills and wipes. Yes, I have three of these bar stools, one is hiding in my sewing room for this picture!

I wanted to dress the stools up just a bit. I decided I wanted to make covers for the top of the stools so that when that day comes when one of the boys "accidentally" spills on the stool, I can just whip off the cover, wash it and then put it back on the stool, and then I have a new looking bar stool again!

I have a ton of fabric. So, while I was trying to decide with what fabric to use, I remembered that in the garage I still had some of the fabric left from the simple valances that I have up in the kitchen. 
That was the answer, I got the fabric, started measuring, cutting and sewing and this is what I ended up with... 
I love them! No more yuk on my stools!
And, to top it off (Ha, no pun intended there!) I have a bunch of fleece interfacing that is the sew in kind, which I will never use, so I used it under the covers for padding on the bar stool. So, not only do they look great, they are comfy to sit on too!  
I am really happy with how these turned out! From start to finish to make the covers, 1 hour. Cost, nothing!

A special thank you to my dad for sanding and painting these stools!

Thursday, February 3, 2011

Design on a Dime....ya, right!

One thing about me is that when I get an idea to do something...I don't stop obsessing about it until I do it! A couple of weeks ago I got the idea of putting up bead board in our downstairs bathroom. It is just a half bath, but it is the bathroom that company uses when they come over. Just like most, times are a bit tight around our house, so I knew I could not spend a lot of money. I had priced out bead board and "according to my calculations" (one of my son's favorite quotes), this project should cost $75 to put bead board up.

I talked to my handy-man...Bob, aka Dad. He was willing to help (he did 90% of the task) me put the bead board up. So off to Lowes...bead board, chair rail and panel adhesive...$120~ Wait! I am on a budget! Ok, I can handle not feeding the kids this week :)

I didn't think to take pictures until I had taken down the couple of pictures on the wall, and we had already taken the molding off around the floor.

So, here is the before...
Just a box for a bathroom
I had already taken the mirror down. Notice the pipes showing under the sink? Well, that has bugged me since we bought our house almost three years ago! I hate that sink!
I really didn't have a design idea...the only thing I knew is that I wanted bead board in the bathroom. So, here is the first completed sheet of bead board up... 
Already I love it! It took my dad and I a couple of days to complete this project. I bet it would have gone a lot faster without the hustle and bustle of kids!  
Originally I wanted to paint the upper half the soldier blue that is really popular right now...but now that the bead board is up, I think I will keep it the tan color. 
This is the new vanity and mirror. It was not in the budget to buy the vanity and mirror. But, sometimes you have to realize your limitations! Cutting the bead board around those pipes was a joke! So, to save the frustration level from going out of control, I made the executive decision to go back to Lowes. So, as much as I hated spending the money, I love the fact that the pipes are no longer showing, plus the vanity has storage in it!


Much better view from the hallway!  
The only thing missing is that I want a white shelf to go right under the wreath on the wall. Other than that, done!
Related Posts Plugin for WordPress, Blogger...